
|
| Place of Origin | China |
| Brand Name | KAKA |
| Certification | ISO9001,CE |
| Model Number | HC-1002 |
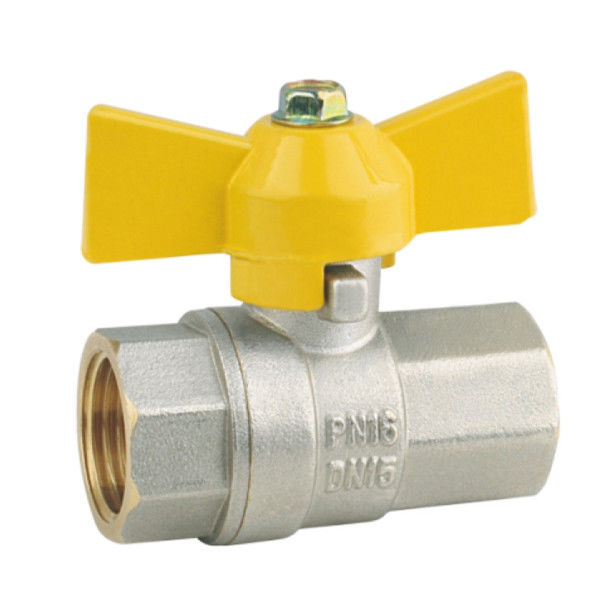
| Name | Brass Ball Valve |
| Material | HPB57-3,HPB58-3 |
| Brand | KAKA |
| Handle | Lever handle with stainless steel, Iron |
| Media | Water, Seawater |
| Surface | Sandblasted |
| Size | DN15-DN50 |
| Testing | 0.6MPa – 0.8MPa by air |
| Connection | BPS,NPT thread |
| Turn on/off | Fast quarter-turn operation |
| Bronze | Corrosion resistant |
| Features | Adjustable stem-packing gland |
| Specs | Blow-out proof pressure retaining stem |
A 3/4 ball valve refers to a type of valve with a ball-shaped disc inside that controls the flow of fluid. The "3/4" designation indicates the nominal pipe size (NPS) or the inner diameter of the valve. In this case, it means that the valve is designed to be connected to pipes with a diameter of 3/4 inches.
Ball valves are commonly used in plumbing and industrial applications to regulate or shut off the flow of liquids or gases. They offer a simple and reliable way to control the flow because the valve is opened or closed by rotating a lever or handle that turns the ball inside the valve body. When the handle is turned to the open position, the ball rotates to allow fluid to pass through the valve. When the handle is turned to the closed position, the ball blocks the flow, preventing any fluid from passing.
The 3/4 ball valve size is suitable for applications where a moderate flow rate is required, and the pipe diameter is compatible with 3/4 inches. It is important to select the correct ball valve size based on the specific requirements of your system to ensure proper functionality and compatibility.
.
How to install 3 4 ball valve ?
To install a 3/4 ball valve, follow these general steps:
Gather the necessary tools and materials: You will typically need a pipe cutter, pipe wrench, Teflon tape or pipe thread sealant, and the 3/4 ball valve itself. Make sure the valve is suitable for the type of pipe you are working with (e.g., PVC, copper, etc.).
Shut off the water supply: Locate the main water supply valve and shut it off to prevent water flow during the installation process. This will help avoid any potential leaks or accidents.
Drain the pipes: Open faucets or valves downstream of the installation point to drain any remaining water in the pipes. This step is essential to minimize water leakage when you cut into the pipe.
Measure and mark: Measure the section of the pipe where you want to install the ball valve. Use a pencil or marker to mark the specific cutting points on both ends of the pipe.
Cut the pipe: Use a pipe cutter to cut through the pipe at the marked points. Rotate the cutter around the pipe, tightening it gradually until the pipe is cut. Make sure the cuts are clean and free of burrs.
Prepare the pipe ends: Use a pipe reamer or sandpaper to remove any sharp edges or burrs from the cut pipe ends. This will help ensure a smooth connection and minimize the risk of leaks.
Apply Teflon tape or pipe thread sealant: Wrap Teflon tape clockwise around the male threads on both ends of the ball valve. Alternatively, you can apply pipe thread sealant to the threads following the manufacturer's instructions.
Attach the ball valve: Screw the ball valve onto the pipe by turning it clockwise. Use a pipe wrench to tighten the valve securely, but avoid over-tightening, as it may damage the threads or cause leaks.
Test for leaks: Once the ball valve is installed, turn on the water supply and carefully check for any leaks around the valve and connections. If you notice any leaks, tighten the connections further or apply more sealant as needed.
Restore water flow: If there are no leaks, fully open the ball valve by turning the handle or lever to the open position. This will restore the water flow through the pipe and the valve.
Q: How long is your product guarantee period?
A: We have Two years guarantee and 24 hours full-time service.
Q: What is your MOQ?
A: Normal Each Items 3000pcs MOQ.
Q: Can you accept OEM,ODM?
A: we accpet OEM.
Q: How long is your delivery time?
A: 30-35 days After Confirm Order
Contact Us at Any Time


